7 Benefits of Shoulderstand

In the book, “Light on Yoga,” B.K.S Iyengar describes Sarvangasana as the mother of all asanas. So why does Sarvangasana (Shoulderstand) get this distinguished acclaim? What is so special about it?
Before we get into the benefits of the pose, let us first take a look at what Sarvangasana actually means. In Sanskrit, Sarva means “all” or “entire” and Anga means “organ” or “body part.” Translated, it means “full body pose” because of its benefits for the whole body.
Benefits of Shoulderstand
In Iyengar’s own words, “The importance of Sarvangasana cannot be over-emphasised. It is one of the greatest boons conferred on humanity by our ancient sages. Sarvangasana is the Mother of asanas. As a mother strives for harmony and happiness in the home, this asana strives for harmony and happiness in the human system. it is a panacea for most common ailments.”
Indeed, since Sarvangasana involves inverting the entire body, it helps relieve a lot of problems we suffer from. Some of its benefits include:
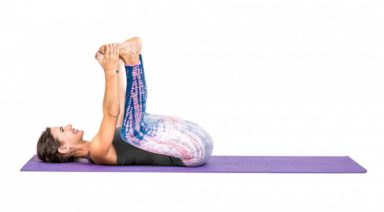
1. Improved Digestion. The change in gravity helps the bowels move freely which aids digestion significantly.
2. Less Strain on the Heart. Since you are lying in an inverted position, the heart doesn’t have to work as hard to pump blood to various parts of the body.
3. Stronger Immune System. The lymphatic system is responsible for immune system response among other functions. The lymph is similar to blood in that it depends on gravity for movement. So, by staying inverted, the lymphatic system gets stimulated and boosts your immune system response.
4. Relieves Common Cold. Since you create a firm chinlock when practicing Sarvangasana and the head stays firm in this inverted position, the blood supply to the head gets regulated and this helps relieve nasal congestions and headaches.
5. Increased Self-Confidence. Although I can’t say my self-confidence has gone up just from practicing Sarvangasana alone, practicing it every day is supposed to help you feel alive and confident.
6. Benefits your Nervous System. In Iyengar’s own words, “Due to the soothing effect of the pose on the nerves, those suffering from irritation, shortness of temper, nervous breakdown and insomnia are relieved.”
7. Strengthens your Upper Body. In addition to all the internal benefits for the body from practicing Sarvangasana, the physical benefits includes strengthening of the neck, upper back and shoulders.
The list of benefits go on and on.
Without question, Sarvangasana is indeed the mother of all asanas. Practicing it every day feels just great for the body and mind. You can learn how to do it here.
Cautions and Considerations
Some considerations to keep in mind as you do this asana:
It is not recommended for women to do this asana during menstruation. It is also not recommended for people with high blood pressure. Also, if you have neck pain, it is best to consult a doctor or do this pose with the help of an experienced teacher.
Keeping 3-5 folded blankets under the shoulder helps keep your neck/shoulder safe. Done correctly, you should not feel any pressure in the head, ears, eyes or throat.
For best results, stay in the pose for at least three minutes (build up to this) and go up until 15 minutes.You can try the many Sarvangasana variations after you can stay in Sarvangasana for at least 5-10 minutes.
About the Author
Why Savasana Is Good for Your Heart
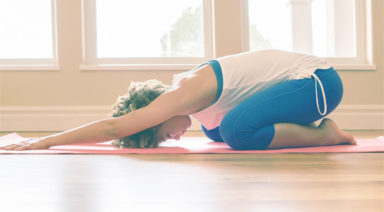
Corpse pose (Savasana) is the final pose of a yoga practice. In Savasana you are encouraged to let the breath be free, but also bring awareness to it as you quiet the mind. To help yourself move deeper into the pose, practice in a quiet and warm space. Mindfully relax all of your muscles, and as you do this, you may want to deepen the breath.
Even though it’s a resting pose, it can be one of the most difficult poses of the practice. Savasana challenges you in ways that you are not used to being challenged. Patience, control of the mind, and complete acceptance of oneself are things that we don’t practice very often. And while some may enjoy the emotional experience it shares, Savasana has many physical health benefits to offer, too, especially for the heart. This February, celebrate heart health and learn about the benefits Savasana offers to your vital organ.
Decreases Blood Pressure
High blood pressure can be caused by several factors, one of them being stress. Having high blood pressure can put you at risk for a number of serious health conditions, including stroke and heart disease. Taking time to slow down, deepen your breath, and relax during Savasana can help decrease your blood pressure.
Reduces Your Heart Rate
High or constant levels of stress can also cause your heart rate to increase – but so can other things, such as caffeine, alcohol and certain health conditions. The slow breathing techniques and relaxation opportunities that Savasana offers can help reduce your heart rate.
Allows the Heart to Rest
Deep breathing exercises major organs of the body, including the lungs. It forces your lungs to work more than they typically do throughout the day and brings in more oxygen to the blood, which then gets sent to the heart. With the lungs working a little harder, it eases the pressure needed by the heart to pump oxygen through the body. This gives the heart a bit of a break, making both your lungs and heart more efficient throughout your daily activities.
Helps You Lead a Healthier Lifestyle
Living a stressful life makes it more difficult to lead a healthy lifestyle. Cooking healthy food at home, doing things that you love and fitting physical activity into your day are harder to do when you live a high-stress life. But neglecting these things can put your health at risk. Some people respond to stress by overeating, smoking, or drinking alcohol – all of which increase your chances of developing heart disease and stroke. Taking the time to practice Savasana along with your slow, deep breaths helps you to reduce stress, calm your nervous system, and think more clearly. Overall, practicing Savasana can help you make healthier choices.
It is recommended to practice this pose for five minutes for every thirty minutes you have spent practicing the asanas/physical poses and movements of yoga. But remember – you can take this practice off your mat and learn how to do this throughout the day, too, helping your heart stay healthy all day long.
Disclaimer: The content in this article is not intended to be a substitute for professional medical advice, diagnosis, or treatment. Always consult your physician with any questions you may have regarding a medical condition. Do not disregard professional medical advice because of something you have read in this article.