5 Reasons to Practice Breath of Fire Yoga
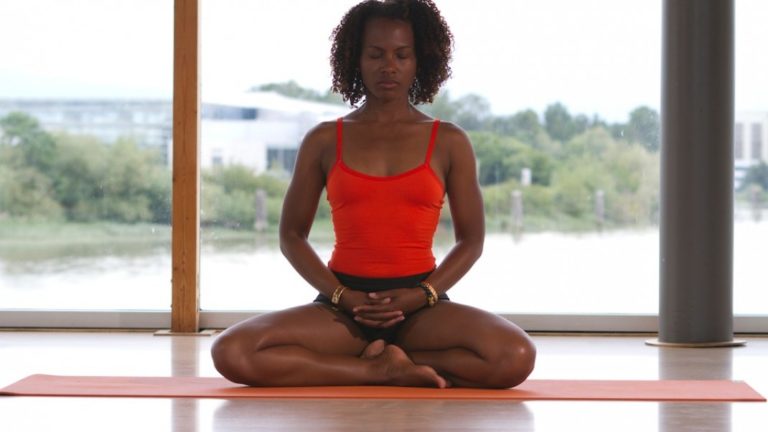
Kapalabhati Pranayama or “Cleaning Breath” is an intermediate to advanced pranayama that consists of short, powerful exhales and passive inhales. This practice is also known as the “Breath of Fire.” The exercise purifies the lungs and nasal passages. It is a powerful, one of a kind breathing exercise that will help the entire body.
Kapalabhati helps to make the motions of your diaphragm very easy and controlled. This helps it to discard the muscle cramps present in bronchial tubes. A lot of force is used to do this pranayama. While exhaling, the process is very strong and while inhaling, the process is very calming. It is a very energizing technique, and when done correctly it will reboot all your muscles. It is also a cleansing technique that places emphasis on cleaning the air passages and blockages in the chest.
Benefits
Cleanse Yourself of Toxic Air
Kapalabhati clears the body from the constant intake of toxins, thus detoxifying it. This technique helps to replace any toxic air with fresh air. The breathing mainly takes place from the abdomen, as opposed to the chest, and this specifically is what helps to remove the toxic air. Kapala means “the skull” and bhati means “brings lightness.” Breathing in this way lightens your skull by extracting problems like sinusitis. This is an invigorating and energizing practice as it fills your stuffy skull with fresh air.
The practice also improves bowel movements which rids the body of the many diseases.
Excellent for Respiratory Problems
It is also one of the best exercises for asthma patients and people suffering from respiratory problems. This stimulating breath can do wonders for every single tissue in your body. The breathing technique will invigorate your spine.
Increases Blood Circulation
It is also useful for maintaining blood pressure. The abdominal organs also become strengthened from the pressure applied to these organs while breathing and exhaling. It increases the blood circulation due to fresh supply of blood. It is also useful for removing impurities from the blood.
Tones Your Abdomen
The abdominal area is toned with the help of this breathing technique. It helps clear the entire nervous system which proves to be very useful in making the body fit.
Helps with Decision Making
A sense of calmness is also achieved due to the lightness of the skull. Kapalabhati helps one to think better and make decisions quickly while also keeping the mind alert. This is a wonderful breathing technique to help the mind and soul, as it helps to awaken the spiritual power which heals many problems facing many of us today.
Contraindications
It should also be noted that Kapalabhati Pranayama is not recommended for those who suffer from cardiac problems, hernia and spinal disorders. In addition, those who suffer from severe respiratory infections, colds and nasal obstruction should not perform this breathing and cleansing technique. Most physicians usually ask people suffering from high blood pressure and diabetes to refrain from performing this breathing technique. Those with abdominal ulcers should also avoid performing the technique. If you are pregnant, you should not practice this type of breathing exercise.
Since there are some Kapalabhati risks it is best to perform it only after consulting with a qualified yoga instructor who has practiced this breathing technique and is familiar with it.
What is Pranayama?
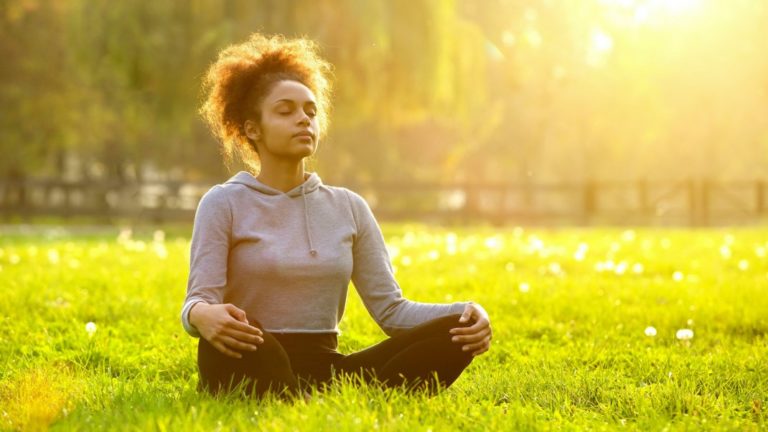
Yoga as a practice has ancient origins. The first textual mentions of the term can be found in the Rig Veda, which was written around 1500 BCE. While nobody knows exactly how old the practice is, some scholars believe that members of pre-Vedic societies practiced yoga even before that time.
The early yoga of the Vedas was much different that what we practice today. While many modern yoga practitioners have come to associate yoga with the performance of physical postures (asana), all of the earliest recorded texts on yoga hardly mentioned postures at all, and instead tended to emphasize the pursuit of liberation through meditation and pranayama practices instead.
What is Pranayama?
The word pranayama is a compound of two separate Sanskrit terms, prana and yama. The Atharvaveda, (one of the earliest Vedic texts on Indian medicine) states that prana is “the fundamental basis of whatever is, was, and will be.” Other texts often translate prana, as the “life force” or “vital energy”. The complementary term yama is often translated as “restraint” or “control”.
Pranayama then, is typically defined as a set of practices designed to control prana within the human body by means of various breathing techniques, meditative visualizations and physical locks (or kumbhaka).
The Sanskrit language is incredibly rich, and like many languages, one word can often have many different meanings. Some scholars, such as Harvard University Buddhist Chaplain Khenpo Migmar Tseten, prefer to separate the components of the compound into pran and ayama for the purposes of translation. When broken up in this way, pranayama becomes pran, (life-force), and ayama (which has the meaning of expansion or extension). In this case, the conjoined term pranayama takes on the meaning of “expansion of the life force”.
The Benefits of Pranayama
In his book Samadhi of Completion: Secret Tibetan Yoga Illuminations for the Quing Court, Fransoise Wang- Toutain states that “Prana is the driving force of all the functions of the body”, and that “the various functions of the body such as swallowing, digestion, and physical movement were all reliant of the efficient functioning of the prana within the body.”
According to Wang-Toutain (and the tenants of Indian medicine), the roots of all disease and mental imbalance can be traced to abnormalities and deficiencies in the body’s energy flow. In Wang-Toutain’s view, pranayama practices serve as a particularly powerful tool to heal illness and correct mental imbalances since “the control of breathing is the most direct method to affect life force.”
The History of Pranayama – A Timeline
The following timeline gives a general bird’s eye overview of the history of pranayama practices. Though this list is neither intended to be exhaustive nor comprehensive in its scope, it includes a small number of key texts that will be of interest to anyone who wishes to learn more about the history and practice of pranayama.
Brihadaranyaka Upanishad
(Circa 700 BCE)
While references to the the term prana can be found as early as 3,000 BCE in the Chandogya Upanishad, references to pranayama as a breathing practice do not occur until much later in yogic literature (approximately 700 BCE).
One of the earliest recorded references to pranayama as a breath related practice can be found in hymn 1.5.23 of the Brihadaranyaka Upanishad. Clearly linking breathing practices to the regulation of vital energy and life-force, the Upanishad states:
“One should indeed breathe in (arise), but one should also breathe out (without setting) while saying, “Let not the misery that is dying reach me.” * When one would practice that (breathing), one should rather desire to thoroughly realize that (immortality). It is rather through that (realization) that he wins a union with this divinity (breath), that is a sharing of worlds.”
No additional guidelines for pranayama practice are given in this Upanishad. However, the idea that breathing could be used to achieve greater health and even immortality is a theme that is often repeated in subsequent yogic texts and teachings.
The Bhagavad Gita
(Circa Fifth Century to Second Century BCE)
References to pranayama practices can also be found in the Bhagavad Gita, Chapter 4, verse 29. The text highlights the use of conscious inhaling, exhaling and breath retention to effect trancelike states. The text also suggests that the regular practice of pranayama can be used to enact greater control over the senses by “curtailing the eating process.”
The Maitrayaniya Upanishad
(Circa 4th Century BCE)
The Maitrayaniya Upanishad is an important text in the history of pranayama because it contains one of the earliest references to pranayama as a component in a larger, multifaceted system. Most likely composed centuries before the Yoga Sutras of Patanjali, this text enumerates yoga as a six-step process of breath control (pranayama), sensory withdrawal (pratyahara), concentration (dharana), meditation (dhyana), reasoning (tarka) and union (samadhi).
Specific references to pranayama practices can be found in chapter six, verse 21. The text states that deliverance can be accomplished by using a combination of breath retention practices and concentration on the sacred syllable Om in order to redirect prana into the body’s central energy channel (Sushumna).
Patanjali’s Yoga Sutras
(Circa 100 to 400 CE)
Most scholars agree that the Yoga Sutras of Patanjali are a compilation of texts from earlier yoga traditions. By the time of Patanjali, yoga as a system had continued to adapt and grow. The six-limbed system mentioned in the Maitrayaniya Upanishad had grown into eight limbed approach that included asana (physical postures) yama and niyama (social and ethical precepts) pranayama as well as four additional stages of meditative absorption (pratyahara, dharana, dhyana and samadhi).
References to pranayama can be found in verses 2.29 – thru 2.53 of the Sutras. While Patanjali does not go deeply into the nature of prana in these sections, he does detail four separate aspects of the breath: inhale, exhale and retention. In addition, Patanajali also makes reference to a fourth pranayama in sutra 2.51 that he claims surpasses or goes beyond the other three.
In addition, Patanjali notes a number of specific benefits of pranayama practice. These benefits include mental fitness and the ability to concentrate – a prerequisite to deeper states of yoga practice. Additionally, Patanjali states in verse 2:52 that regular pranayama practice could lessen or dissolve the veil that covers our “inner illumination.”
The Hatha Yoga Pradipika
(Circa 1500 CE)
Though traditionalists trace the roots of Hatha Yoga practice to the God Shiva, many scholars associate the founding of the Hatha yoga movement with the Maha Siddha Goraksha Nath. Widely associated with being the founding father of the practice, Gorakshanath is purported to have lived sometime between the 10th and 15th century CE. Numerous texts are accredited to him and his disciples.
One of the most important texts of the medieval era is the Hatha Yoga Pradipika, which was written by Goraksha Nath’s pupil Swami Svatmarama. Drawing from earlier systems, the text emphasizes the attainment of good heath and spiritual realization through a combination of physical postures, pranayama practices and meditative contemplations.
The Pradipika differs from some of the early texts in the history of pranayama, because it more fully details actual instructions for practice. These instructions include specific references to alternate nostril-breathing patterns, details on how to retain the breath, guidelines on auspicious times for practice and an overview of the various signs of progress in pranayama.
Further references to pranayama techniques can be found in a number of additional medieval manuscripts. The most important of these texts include the Gheranda Samhita (late seventeenth century) and Shiva Samhita (seventeenth or eighteenth century CE).
Pranayama Today
While most modern pranayama practices are based at least in part on their original counterparts, contemporary pranayama practices often include a number of additional variations on the basic breathing patterns found in the earlier texts mentioned in this paper.
Modern variants on the practice tend to integrate a combination of modern anatomical knowledge with more traditional yogic teachings in order to refine technique and better explain the physiological and psychological processes that occur when practicing pranayama.
The most notable example of this new approach to pranayama practices can be found in the book “Light on Pranayama”, by the the late B.K.S. Iyengar. A seminal text on modern day pranayama practice, Iyengar’s book is a must read for any student with an interest in the history of pranayama.
Where Should I Begin?
Pranayama practices are best learned under the guidance of a qualified instructor. Though not commonly known, many Tibetan Buddhist monks and nuns practice traditional Hatha Yoga pranayama exercises that can be traced to the 9th century CE. Many contemporary yoga teachers offer pranayama as part of their classes as well. This video on Gaia is a great place to start if you wish to begin the practice.
A Short Exercise for Home Practice
If you wish to begin practicing today, consider trying this alternate nostril breath from the Hatha Yoga Pradipika.
To begin:
- Come to a comfortable crossed legged position
- Block your right nostril, and inhale slowly through the left.
- Hold your breath for a few counts, and then exhale slowly through the right nostril.
- Block your left nostril, and inhale slowly through the right.
- Hold your breath for a few counts, and then exhale through the left.
Repeat the entire cycle for a minimum of seven repetitions. As you become accustomed to the exercise, practice for longer durations.
Practice notes: If holding your breath is uncomfortable at first, begin with very short breath retentions. As the practice becomes more familiar, gradually extend the length of the retention. Breath retention is contraindicated for expectant mothers.


